1927 Model T Ford coupe. Chev 350 /350 trans.
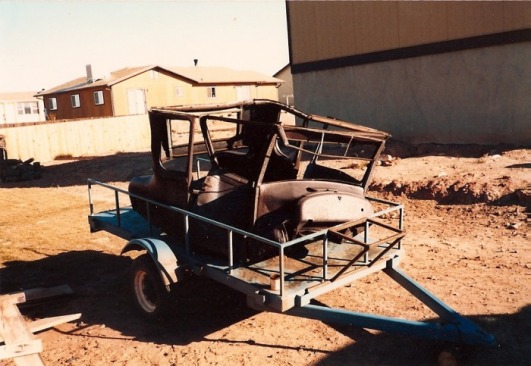
This is what I started with initially. It took this body and another one plus some sheet metal, bondo and a lot of hard work to get this coupe looking like it does.
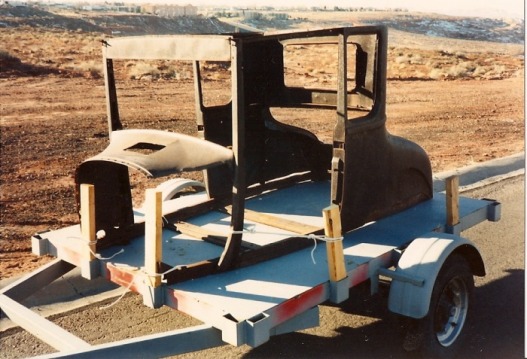
As you can see, this body looks like it would be a better place to start. As mentioned, both cars were used to build one nice one.
In this case, a good place to begin was to sand blast the body inside and out. It’s a lot better to prepare a body / sheet metal prior to beginning a project than to get into it and find out it can’t be welded or worked because of=2 0all the rust. If I were to blast this body today , I would use soda instead of sand. There is less distortion and keeps more good metal in place instead of removing it with the sand. Also there is less chance of blowing through and creating more problems.
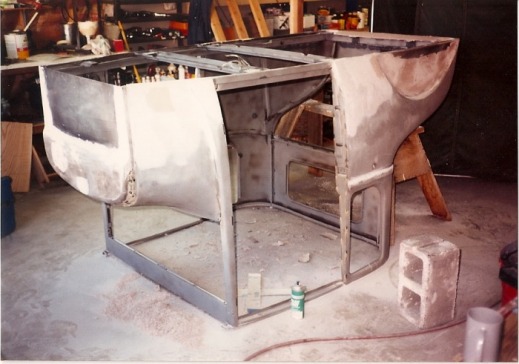
Sometimes it just makes good sense to turn the body over to work on it. Here panels have been replaced and a new firewall put in as well as some wheel well work. This body is in the first stages of rebuild and is ready for the frame and suspension to be fabricated.
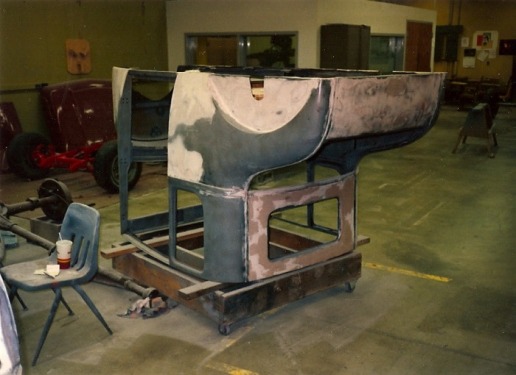
Then there are times when you need to work on the body with it upside down and on a cart so that you can move it out of the way to make room for other cool projects.

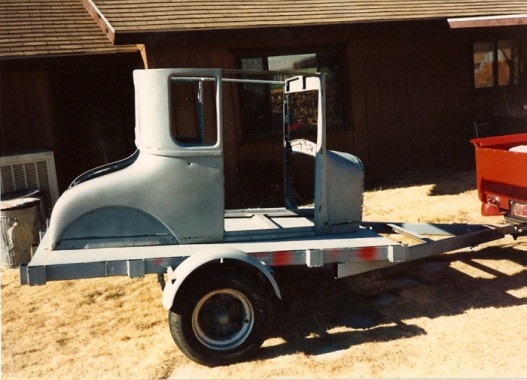
The rear of the car also needed some patch panels along the top of the trunk opening and across the bottom of the rear pan. Old metal sometimes requires bondo to cover the entire panel even after a lot of metal work. I am not a metal finisher. I am a bondo finisher – after I get the metal as close to original as possible.
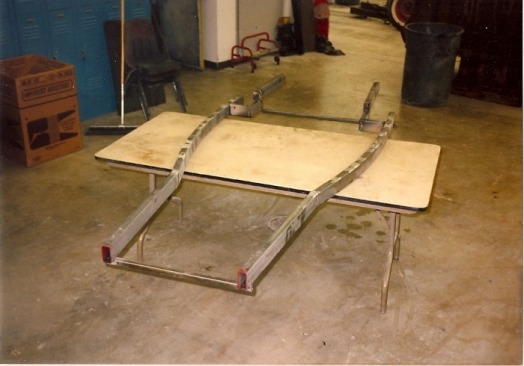
The frame is built from 1 ½ x 3 inch .188 wall tubing and is curved to fit the bottom of the body. The procedure for this is shown in my DVD from Streetrod 101. It is not hard to do and an entire frame with brackets can be built for less than $250.00. You see I have more time than money and I like everything to fit right.
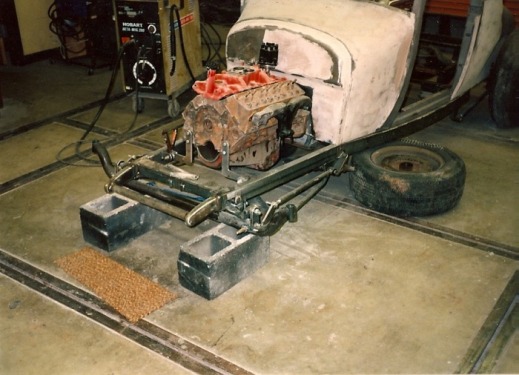
As I begin to build the frame and set up the suspension system, I have always found it easier to start with the rear suspension system and work forward. This way I can adjust the body , rear end , wishbones / radius rods etc.and can work the kinks to the front and then finish with the proportions working out just right. Since I didn’t take any pictures of the rear under construction- we’ll look at the front and you can pick up on the rear in a later photo. All the brackets , cross members , radius rods, shock mounts, engine / trans mounts, panhard bars, front frame horns, etc. are all shown in the DVD.
Here is another view of the under construction procedures with the body mounted. This particular car was fabed together and everything built and tacked in place in about 6 days. I did it over Christmas break one year. Now the finish work is what really takes the time!
Kind of a similar shot from a little different perspective. It’s a good idea to stand back and visualize your work from time to time so that the proportions are correct. You may even have to push it outside and call in a couple of friends to get their opinions. Listen to their ideas and then do what you want !
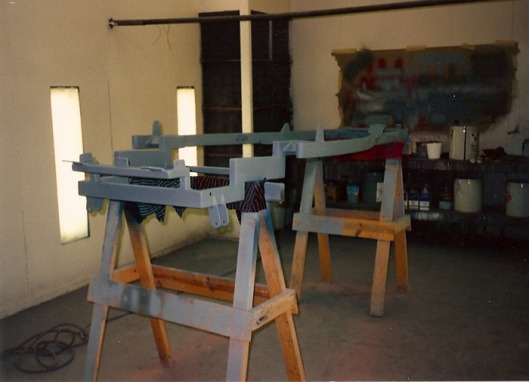
Here is the completed frame perched on the tall saw horses I built. It’s amazing how many brackets, braces, holes, etc. are in a frame to make it all come together. This is one of usually three primings that it takes before the frame is ready to final coat. If available, I like to do each prime coat a different color so that the high and low spots show better and also it allows you to not over sand and put dips and doodles in the surface. Cheap flat black in spray cans works equally well!
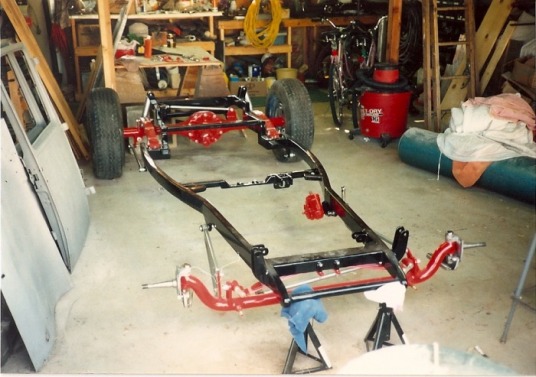
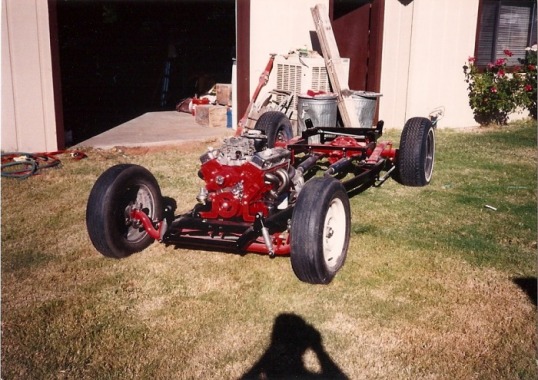
The frame and suspension are painted and assembled. There is no chrome on this car other than some nuts and bolts. The radius rods, panhard bar, drag link , and tie rods are all painted silver along with the spindles. I did not build a “ K “ member with this frame and it works ok. The problem is that if you put a high performance engine or stand on it all the time, then the frame will twist and can do strange things. I built this car about 30 years ago and was still in the learning process. All the cars I build today, are actually quite strong and they do utilize a “ K “ member type sustem as shown in the DVD. I also use a much stronger and somewhat different type of transmission crossmember. This coupe also used a mustang steering box mounted on its side aka- 70’s style.
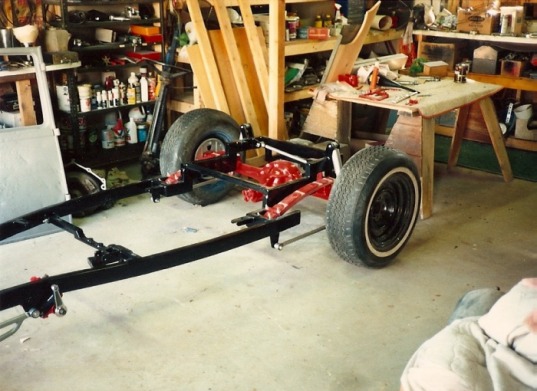
This will give you an idea of the rear suspension. It uses quarter elliptic springs and mounts on top of the axle with brackets and no shackle. This gives you one top parallel bar and when you put one bar below the axle and mount it to the frame – you have a rear parallel bar , spring suspension. The panhard bar keeps everything in place and it rides real good and is inexpensive to build. By the way, the bulk of this car was built in a 1 ½ car garage. The shop was used primarily for the priming and painting.
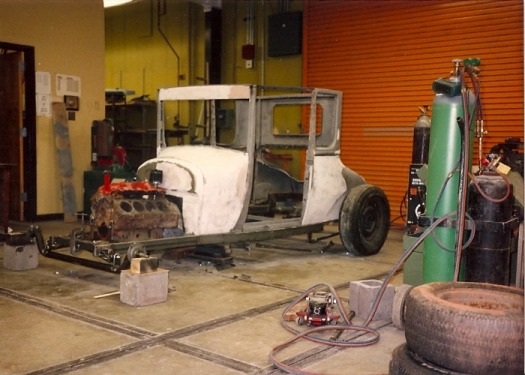
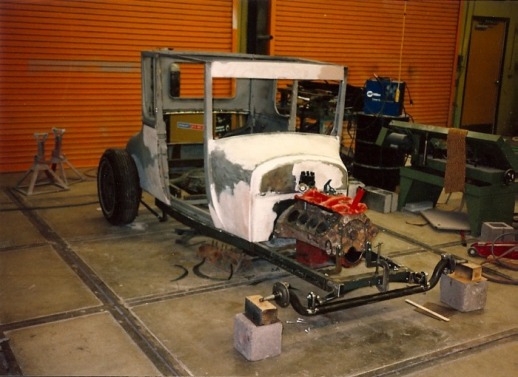
Most everything is mounted now for the last time: engine / trans, exhaust, and everything needed. The body is almost ready to mount and then the fun really begins, wiring , dash, gauges, etc.
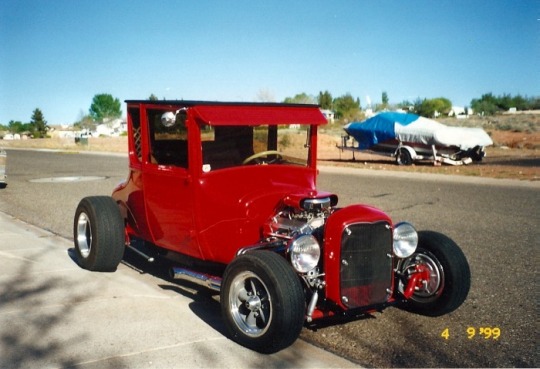
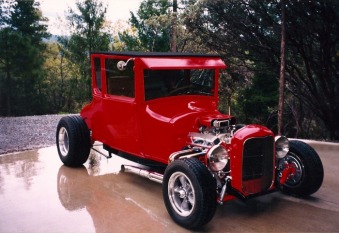
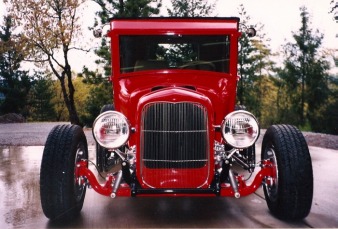
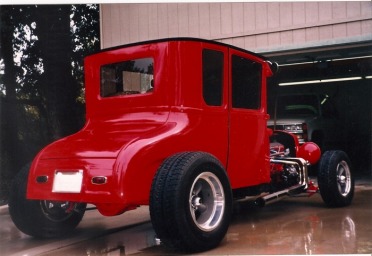
The finished product. This car has been driven at speeds up to and including 120 miles per hour! Not recommended by me. I do not have a death wish and I was not the one driving nor was I a passenger in this buggy!!! The car handles and performs as good as it looks. Not bad for a junker / rust bucket!
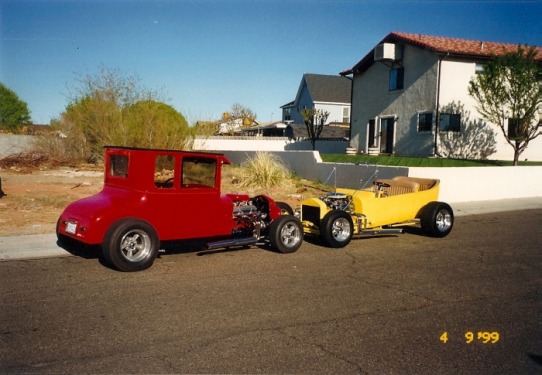
The fellow I sold the coupe to came through town on his way to Goodguys and stopped by to see me. I thought it would be a great opportunity to take a shot of two rods that I built in a 1 ½ car garage. As far as I know both cars are still on the road – the touring is for sure, because the fellow that owns it lives here in town and I see it quite often.
