1927 Ford Track T Roadster - fiberglass: 350/350 trans
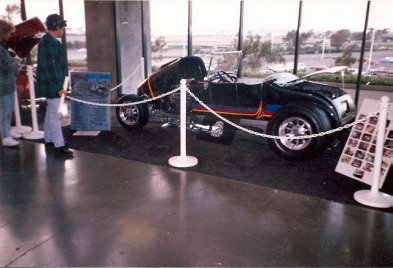

This car was started in 1984 finished in 1987 and won 1st place in its class – Altered T Roadster – at the 1989 Grand National Oakland Roadster Show!! This is by far one of the nicest , most detailed cars that I ever built. Every nut, bolt, washer, cotter pin, brass fitting, brake line, radius rod, drag link, tie rod, panhard bar , and anything else that could be chromed was chromed. No bondo was used on the frame and everything was molded together. The car literally looked as though it had been poured from a can into a mold. It was painted black with pearl and then clear coated. The column was from a 1965 or 68 Buick , it had a wood dash, and a hand built- tilt fiberglass front end. The exhaust was hand made and took a long time to finish the welds and make it all flow together. The exhaust was painted black because my Cousin – whom the car was built for, wanted that look.
I don’t have a good picture of the interior but it had scallops on the inside panels that matched the outside scallops. I did not paint the scallops or do the interior. But, both were beautifully executed ! The car itself drove , road , and handled excellent. The only problem with this and other track T’s is the fact that they do not cool well because of the limited amount of air flow through the small opening in the nose. This car had a custom radiator , shroud, and electric fan – still ran hot. It didn’t overheat, just ran hot ! When the hood/ front end was propped open 1 inch, the engine ran cool. Air flow is a big problem when building this type of hot rod.

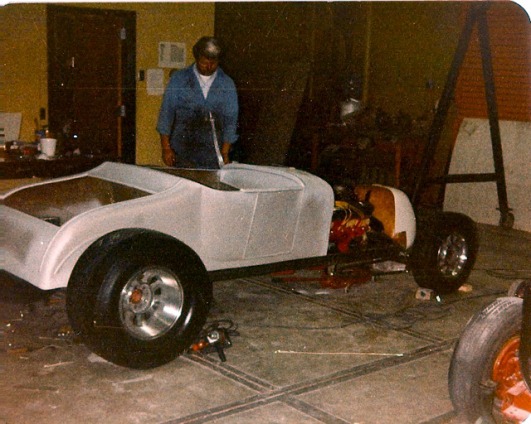
Here is how it all began. The frame was built from 1 ½ x 3 x .188 wall tubing ( which is what I build all of my frames from unless I use 1/1/2 x 4 x .188 ). Again, my DVD shows this type of construction and much much more. The rear suspension is a quarter elliptic with a panhard bar to keep it all in place. The front is actually a suicide front but it really doesn’t show because the one piece nose piece covers it up. The body is fiberglass and the firewall was cut out and I made a flat one that bolted in place with chrome cap screws ( socket heads w/ smooth outside). The garage shown is only a 1 ½ car garage that built many hot rods. The dune buggy is Corvair powered – and yes my kids had to wear safety goggles when we took it out for a spin!

I took the car up to the shop during Christmas break and worked on it there. This shot is showing the rear suspension forward with the engine mounted. Again, when I build cars , I like to start from the rear and work forward. This way all the wrinkles and proportions work out better.

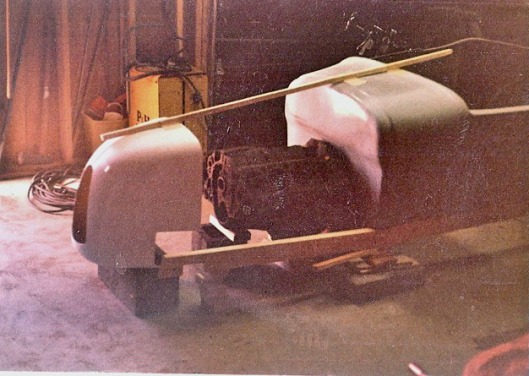
This shot shows the radius rod bracket, spring perch, upper shock mount, and headlight mount coming off of the shock bracket. You can also see the front crossmember and the approximate relationship of the nose piece and the front end.
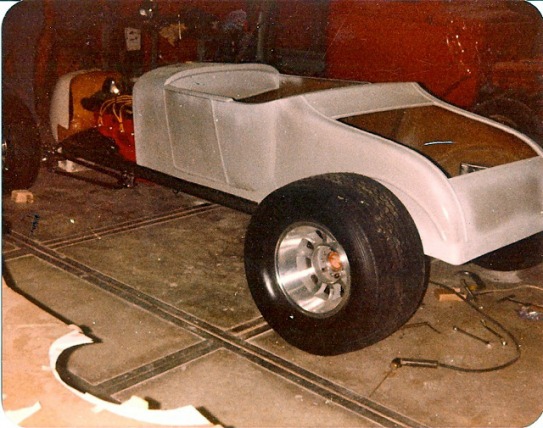
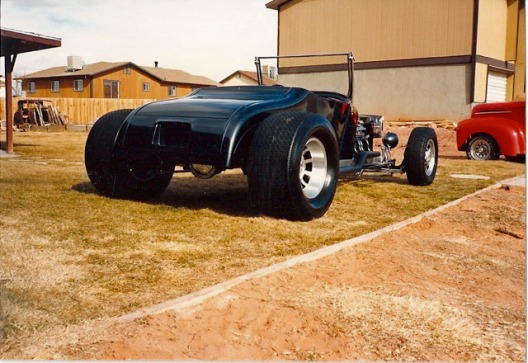
The car is a high boy and this picture shows the body, frame, front end and tires in its proper perspective as to ride height and tire size positioning and location.
Another shot farther back showing the attitude and proportioning. The young good looking guy with the white spot in his hair is the same guy that is writing this commentary. Remember, this was 1984 and now is 2009. Still young at heart though!!!
Time to build the nose cone for this rocket. The nose piece was purchased ( I still have it in the shop today ) and I took 1/8 x 1 inch pieces of pine and screwed one end to the inside of the nose piece and the other to the cowl siding on the body ( we’re back in my garage now) I then covered the strips with fine mesh screen and then put 7 gallons of bondo over the screen and shaped it to form a buck ( mold) If I were to do this today, I would use sheet rock mud for several reasons.: it is much less expensive, easier and faster to work / shape, and will give me the same results sooner. However, I used bondo. Primed it with lacquer primer, sanded , filled, and finished just as though it were a car part. I sprayed it Red catalyzed acrylic enamel , cut and buffed it till it was smooth as glass! Put several coats of automotive paste wax over it and buffed it till it was perfect. Sprayed three coats of mold release over the buck, and then when dry – laid up three layers of 1 oz. fiberglass mat adding some wood strips on the last layer for strength and then joined the wood together with other pieces to form a sort of cage that would give the mold the strength when I separated the two. The mold actually came off the buck very nicely and then I cleaned up the mold release on the inside and filled the small air pockets with spot putty , sanded and then sprayed three coats of mold release inside – let dry and then laid up four layers of 1 oz mat. 1 oz. mat works easy and conforms to angles, curves, and breaks easier that the heavier mat.
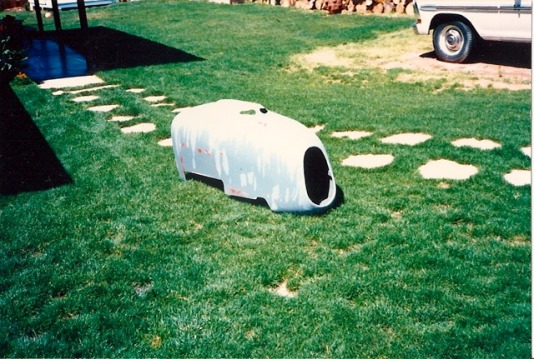
Here is the finished part. This has several coats of lacquer primer 9 (that’s what we used in the day) and you can see the spot putty ( red ) . The darker grey areas are water . I’ve been wet sanding. Use a jig saw , hacksaw, or hacksaw blade with a 24 –32 tooth blade to trim the part. Sand ,prime, fill, sand, prime, fill – you get the point – till you have what you want for a finish.
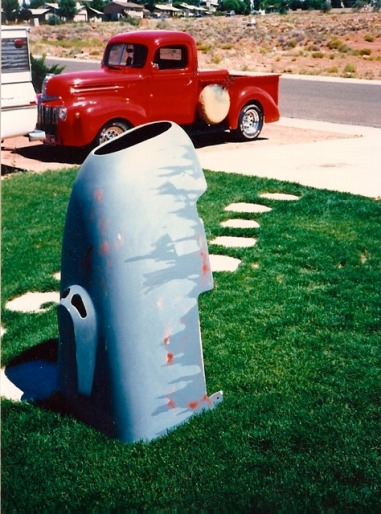
Another shot showing some detail of the scoop and the opening. The opening was solid and then the opening cut after the part was pulled from the mold.

I didn’t take a lot of pictures during this build. I always thought it was a waste of time. Now I fill albums with each car that I build. I encourage anyone who is building a car to take lots of pictures. I often go back and use them for reference and also to get ideas. Here is a front shot with the car running but not finished. It lacks the scallops and interior. Personally , I liked the car just black – but it wasn’t my car. The car was built with a two four set up ( WCFB ‘s) but they were old and even after I rebuilt them , they just didn’t run right. Probably high mileage carbs and worn out from the inside. Traded the two fours for an AFB and it ran great.
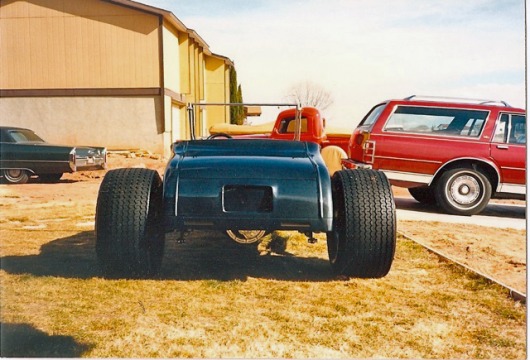
A nice rear end shot showing the frenched license plate area and if you look closely – the taillights are side marker lights from a whatever – can’t remember the car. I think it was a 70’s Pontiac but not sure. Anyway they were long narrow slits. Nice stance with plenty of ground clearance.
Great side shot. This is where all the planning in the early stages pays off. I sure did like the black finish on this car.
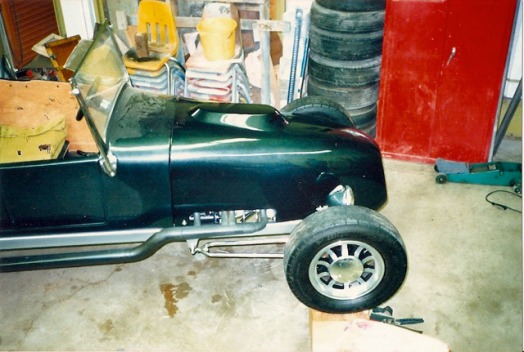
Back in the shop. This view illustrates the importance of a good fit, both for the exhaust and the tilt front end. When a car is finished and you look at the car and the whole thing flows – then the builder did his job. If the car looks broken up – even though it looks good – the planning might have needed some more time and /or changes or thought. This is not to say that it is not a nice car. This is the difference between 1st place and 2 nd Place.
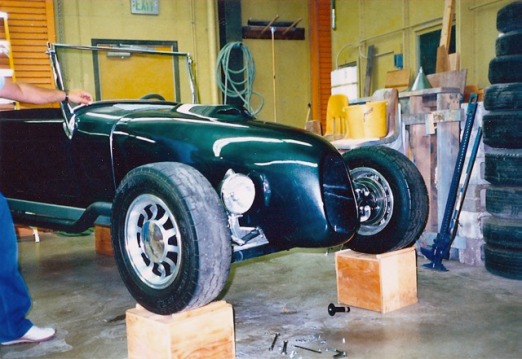
Last shot. Notice the wooden car stands – 2 x 12’s , plywood, and some wood tire stops on top. I used these to build and work on a lot of cars. Now I use different ones that are shown in some of the other pictures in this Blog. Grill bars were added before the car went to California. They were 3/8ths round stock tacked to a 1/8th inch plate top and bottom – chromed and then screwed (4) to a lip that I built onto the inside before painting. The lip or platform was made of oak glassed to the body with fiberglass bondo.
